It’s time to put on a brave face and dive into this build. First, the runners:

It may not seem like a lot at first glance, but don’t be fooled. The C-Runner in particular is loaded with parts. This is a more detailed model than you might think.
There are a couple of observations I’d like to point out before we get started on the build proper.
The Plastic
The white plastic - specifically, the white plastic on the D-Runner (which mostly contains parts for the shield) - is very strange. It has a semi-matte finish out of the box, and while I can’t definitively prove it, it felt as if it absorbed some of the color from paint and markers, making it harder to wipe it off or otherwise clean up my work.
If I had to compare it to something, it reminds me of some of the plastic I’ve seen on cheap over the counter medical devices, like a pregnancy test or a COVID test. Suffice to say I’m not a fan of it.
Permet Gimmicks
We’ve got a couple of Permet-related gimmicks. The first is this chest piece, which shows off all those cool red Permet lines we talked about last time:

It’s basically a clear piece of plastic with the details baked inside. I’ll let Aerpla-Kun explain the fancy new technology that makes it work:


There’s also a plain, clear version of this same part, which is where these decals come into play:
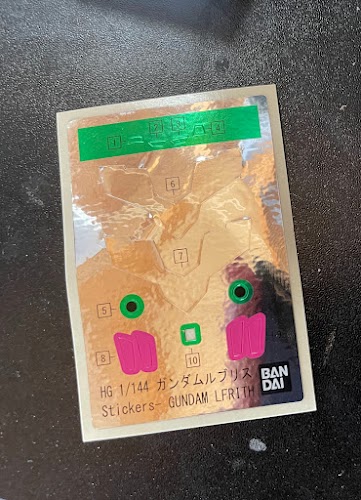
As you can see, there are two decals in the same shape as the chest piece, but for some reason they don’t have any markings. They’re just plain and silver.
What’s going on here? The answer is that these stickers are backwards, with the details on the sticky side. Here, I’ll peel one off to show you:

As you can see, this one has the same Permet markings we just saw, but the other decal is plain black, so you choose to display Ilfrith with or without its Permet Level jacked up.
Head
In retrospect, I shouldn’t have started the build with something as highly visible as the head, but I didn’t quite know what I was getting into at the time. Suffice to say that this ended up being a trial by fire, one that taught me some valuable lessons about this build, such as:
- If you want this model to be fully color accurate, it’s going to take more painting than you might expect from a modern High Grade
- The assembly is sometimes going to be unorthodox
- The white plastic easily stains, and it’s not easy to scrape either paint or Gundam Marker off of it. You better make damn sure your panel lines are neat and thin before you apply topcoat
Sadly, I learned that third lesson the hard way, so the head doesn’t look as good as I would have liked. But first things first, let’s step through the build.
First, we start off with this single piece, which features both the “face” and the ears:

As you can see, there are panel lines to be filled in around the “mouth”, as well as some grills running along the side (which I painted metallic).
Next, we add this framing part:

As you can see, this part contains the head vulcans, which are supposed to be painted pink. I tried, but ultimately failed to match the same color pink as used in the rest of the model, but this is such a small detail that I’m not too worried about it.
One thing I found a bit odd is that this framing part rests at an upward angle. It looks wrong at first, I swear this is how it’s supposed to go.
Now we insert this green part in a vertical orientation:

This part features both the eyes and the front facing camera sensor. This is common for Gundam-type mobile suits, but usually the equivalent part is positioned vertically.
Our second to last step is to insert this clear part right above the eyes:

Technically this is supposed to glow with red Permet Lines, but the kit doesn’t come with any decals to use for this purpose.
Finally, we top it off with the upper half of its “skull”:


Now, you may notice in the photo above that the Ilfirth’s mouth looks all jacked up. That’s because my grey Gundam Marker bled, and it ended up looking pretty bad. So I (stupidly) thought it’d be okay to scrape some of it off with my hobby knife, and now there’s scratches all around. I do this all the time, and I always forget how bad it ends up looking.
The only silver linings here are that a) it doesn’t look too bad from a distance, and b) the Ilfrith looks so skeletal that having a craggly looking face feels weirdly on brand.
Overall, it’s a pretty good looking head. There’s a lot of color separation and depth, and it manages to do it all with relatively few parts. The amount of detail and the amount of different shapes that Bandai can now mold into a single part is astounding.
Chest
The chest is made out of twelve actual, non-polycap parts:

I don’t think that’s a record, but that’s still a lot for a High Grade. I told you this kit was more involved than meets the eye.
We start off with this inner frame, which includes two green decals in the center:

Then we add a layer of pink:

And a layer of white:

And lastly, we add the Permet panel:

A couple of notes here:
- If you look closely, you can see some more Gundam Marker bleed, particularly on the white plastic. It’s not as bad as on the head, but it’s not great either.
- The chest has three different colors of plastic layered on top of each other, and as such it looks quite intricate. I’ve been saying this a lot over the last few years, and it’s still true - it’s amazing just what you can pull off with some simple layering of parts.
- But it’s not just parts layering at work here. Some of the individual pieces are insanely intricate.
- That intricacy comes at a potential cost, in the sense that it requires a lot of panel lining. But you also have to be careful; I’ve seen a lot of Ilfrith builds online that use extremely heavy panel lines, and in my opinion it makes the model look a little too busy. I tried to keep my panel lines thin, and aside from the marker bleed I think it was a success.
- The Permet panel is held in by nothing more than two small tabs. All you have to do to remove it is just pull it outward. In theory, it should be easy to swap the two versions in and out.
Before we move on, here’s a shot of the alternate “dark” Permet Panel:

Lower Torso
It’s not made of all that many parts, but just look at them!

I’ve never seen Gunpla parts in such crazy shapes. Two of them look a little bit like TIE Fighters.
As you can see, it all goes together very simply, though the intricacy of the parts means that it doesn’t necessarily look simple:

Yes, the Ilfrith has the equivalent of a tailfeather.
This was the point in the build where I stopped using the grey Gundam Marker, as there was once again marker bleed. The rest of the build instead has hand painted panel lines.
When we attach it to the upper torso, you really start to see that hourglass figure emerge:

Feeling Down
It was at this point in the build where I started to feel really down. The process has been more error prone than I would have liked, and to be honest, I could have avoided a lot of it if I applied a little more care and patience.
And of all builds to put some extra care into, surely this was the one. After all, I purchased a special stand for this model. I purchased the official accessory to display the GUND bits. And it’s been predestined all along to have a special spot in my glass display case. If you put that much time and energy into a build before you even start it, you damn well better take the build seriously.
The problem I faced is that I came into the build with “just power through it” mentality, in hopes that that would help me get over my initial feelings of intimidation. And it worked great to solve that particular problem, but it came with a cost, namely in the form of sloppiness.
For now, I plan on powering through the rest of the build as best I can, without overthinking the mistakes I’ve made. That’s the only way it’s going to get finished. However it looks is how it’s going to look, for better or worse.
Other Thoughts
I have some concerns with the design of this kit.
First, as I mentioned earlier, some of the white plastic seems to absorb paint and marker, which makes it harder to clean up panel lines.
Second, the gating on some of the runners is weird. Instead of the gates attaching to the sides of parts, instead they’re often attached to the front/outer surface. If you don’t clean up the sprue marks enough (or if you go too far and accidentally cut into the plastic), you’re going to end up with some noticeable mistakes.
Third, because there is so much detail on these parts, some of them require a lot of panel lining. And some of those panel lines are in spots that are difficult to reach (and make for equally difficult cleanup). I don’t want to sound like a buzzkill, but I think this kit approaches the limit of how much detail you can include in a High Grade.
To be clear, none of this makes it a bad kit. It just requires a lot of extra TLC if you want to come out looking great. But if you can manage it, you should have a phenomenal little High Grade on your hands.