Early on I could tell this was going to be an unusual build, so I started taking lots of Work In Progress photos right from the very start.
However it didn’t take long before I remembered why I slowly moved away writing detailed, nitty-gritty Work In Progress build posts. No matter how many photos I take, there are always a few key shots that I forget to take, and that throws the whole effort off.
(Also, sometimes I take a bunch of photos for some specific purpose, only to forget what that purpose is later on when I sit down to write)
Sure enough, all of these happened during this build, so apologies in advance. I’ll do my best to work with the photos I have.
But first, the runners:

The Runners
This thing has quite a few parts, moreso than a lot of other High Grades. So much so, in fact, that at first I wondered where the heck all these parts were going to go. I do think this model has some pretty impressive color separation, but still.
I guess theres’ only one way to find out. Let’s get cracking.
Beam Sabers
There are two sets of beam sabers. The “real”, useable ones are made out of two pieces:

I’m starting to hate two piece beam saber handles, at least when it comes to High Grade models. At 1⁄144 scale, it makes for too flimsy a construction, while also being too small for it to lead to any meaningful improvements in detail.
The second pair are non-useable handles, which sadly aren’t pictured here. They’re just one piece, and they are shorter than normal, as they are meant to be stored inside the Barzam’s wrists.
Beam Rifle

While working on this, I kept going back and forth on whether this was or wasn’t a lot of parts for a single accessory. It’s definitely more than you usually get for a High Grade, but at the same time, it’s obvious where every single part goes, so it can’t be that complex.

Similarly, I kept going back and forth as to whether this did or didn’t require a lot painting and detailing. It certainly felt like a lot while I was doing it, but it didn’t seem so bad in retrospect.

The cable that connects the rifle to the mobile suit must be retractable (at least in-universe), since there’s a shortened version you can optionally use:

That doesn’t make a ton of sense to me, but what do I know?
All in all, I’m not sure what to make of this weapon. It feels like a rough prototype of the Exia’s GN Sword, in that it almost looks like a combination of a gun, shield, and melee weapon. But it’s not really one. It’s just a gun with some blade-like prongs. It’s in a bad middle ground, where it looks too fancy for a single purpose weapon, but not fancy enough to be multipurpose.
Vulcan Pod
Just like the Gundam Mk II, the Barzam has no head mounted vulcan cannons. Instead, it has a head mounted “Vulcan Pod” that looks an awful lot like a fancy set of sci-fi headphones:
It’s made out of two parts, and despite its small size it has a lot of opportunities for detailing:

Head

When I first attempted this build back in November, I started off by snipping out all the parts for the head. I’m not sure why I wanted to build this kit from the head down, but I might as well roll with it now.
At seven total parts, the head is a bit more complex than usual. Most High Grade Gundam-type models clock in at around 5-6 parts for the head, and most monoeyed mobile suits clock in at even less. Let’s put them together and see those extra parts make any difference:

There’s some nice surface detail, both on the outside and on the inside (notice the track running along both sides of the monoeye). But I’m not sure if the parts count itself is noticeable. That’s not a judgement, just an obseration.
In any case, it looks pretty good. Beyond just being a monoeye, it has that “evil knight in evil armor” look that you get from a lot of Zeon designs, without being a literal Zeon design (I’m looking at you Hizack).
My only other observation is that the yellow fin on top looks a bit too tall. But I learned long ago that sometimes things look out of proportion in isolation, but not on the finished model. We’ll have to wait and see if that’s the case here.

Torso
The torso is so complicated, so we’ll have to go through it in stages.
First, we start off with the “upper” part of the torso, where the head and arms will connect:

There are a lot of little parts here, to the point where it almost feels more like a Real Grade than a High Grade. But I’m not entirely sure whether this will lead to better articulation, on account of the Barzam’s bulky size.

Next there is this inner chassis:

This is the core the torso, and everything builds on and around it. That’s a bit of a problem, because of these two piston-shaped parts:
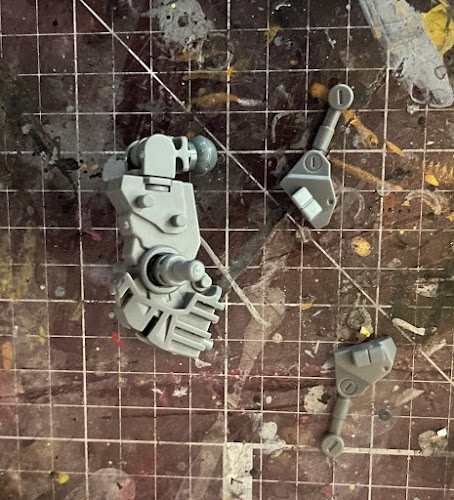
I wanted to paint these chrome, but I couldn’t do that until after everything is topcaoted. That means I had to topcoat all the pieces first before doing assembly. It’s not the end of the world - I did builds that way for years - but it did create some extra work.
Moving on, we have the armor for the front of the chest:

Here it is attached to the main chassis:

Flipping it around, we have some armor on the back:

If not for the orientation of the parts, I’d say these look a bit like wings:

We have some yellow panels on the side, just because:

And finally, we get to the backpack:

And assembled:

Lastly, here’s a slightly better shot of the fully assembled chest:

It’s quite impressive looking, with the sheer amount of parts and color separation.
Conclusion
Let’s stop here. I have the rest of the build completeWe’ll wrap up the rest of the body in a second post.