I have, of course, built the Real Grade version of Wing Gundam, but never the High Grade. That means that I won’t have anything to compare this build process to, but will have something to compare the final build to.
Anyway, here’s what’s in the box:

We’ve got twelve runners, which is an impressive number for a High Grade. Keep in mind, however, that this kit includes most of the runners from the HG Wing Gundam, plus new ones for all the Fenice’s custom parts. I have a feeling that a lot of these pieces are going to be left unused.
Beam Rapier
It’s a really simple, three piece build, but it looks pretty nice:

Unfortunately it’s also a pretty crummy build. The handle is extremely loose and easily falls off. It’s like the parts weren’t as precision engineered as usual, meaning the handle doesn’t slot in as snugly as it should.
Buster Rifle
Like I said before, the Fenice’s Buster Rifle has a secondary beam rifle built into it. There are two cool things about this second gun:
-
It's completely detachable:
-
When combined with the main Buster Rifle, they're designed to look very similar to the original Buster Rifle as used by the original Wing Gundam. Here it is compared to the rifle from my Real Grade Wing Gundam:
It's a bit thicker, but it has the same general silhouette, and it still preserves the yellow triangle running along the bottom.

(speaking of which, the yellow triangle is a color correcting decal, rather than plastic. It’s a bit of a pain to apply, as I had to use some super glue to keep it from peeling away. But I’d rather deal with that than bust out any yellow paint)
There’s all sorts of surface detail here, and normally I’d try to paint it in. This time I had to force myself to just do some simple panel lining. This isn’t a model of a “real” mecha, but rather a model of a model. I want that to be reflected in the final look.
Beam Shroud
It’s just a single piece of clear plastic, though I do like the shape:

I think it works well both for standing poses, as well as dynamic action poses.
Feet
I feel like it’s been a while since I built something with such narrow, tiny feet. Nor am I used to seeing feet that are quite so simple underneath:

That’s not a complaint, just an observation. It was nice not to have to remove seam lines1, and the only thing that needed to be painted is the square opening in the toe.
As for panel lining, this was my first chance to try out my plan to use brown paint for panel lining. I have a few different brown tones, and it turns out the one I thought would be best ended up being the worst (while the one I thought would be worst ended up being the best. Go figure).
Legs
This kit may be ten years old at this point, but in my experience any High Grade from around the 2012 mark and onward is a “modern”-style kit. That means that it has fairly decent joints made out of partial inner frames, and it tries to hide seam lines as much as possible. While it’s true that I’ve never built a High Grade Wing Gundam before, nevertheless this build process felt very familiar and comfortable.
A few observations on the legs:
-
The inner frame itself has multiple sockets and ball joints for various pieces to plug into, namely the rear thrusters and the ankle armor:
-
This is our first example of asymmetry in this model, as the front shin armor is different on each leg:
- In terms of color correction, there are two rectangles at the bottom of the ankles that you can painted grey, and that's about it.
-
With all the brown panel lines, this model is starting to look like it has the same color palette as a Burger King commercial:


Skirt Armor
Assembly is pretty simple, with every skirt being a single piece:

I went a little nuts with the panel lining on the front skirts, which I now regret.
There are actually two color correcting decals here, in the form of the two black, rectangulr holes in the top of its crotch area. It was nice to not have to paint that in.
Upper Torso

This was rather and simple and pleasant to build. A few observations:
- The chest gem is not made out of green plastic, but rather clear plastic piece with a green decal behind it. The illusion is surprisingly effective.
- The black holes in the yellow chest vents were surprisingly easy to paint in.
- As you can see, the backpack has two asymmetrical mount points. I’m not sure if the one on the right is the same as the one on the OG Wing Gundam, but the one on the left definitely isn’t. It has two points of articulation, and two connector points, all to accommodate the two wings.
Head
The Fenice comes with a custom piece for the head, which is why there are two of them:

In the time between when I built it, and when I wrote this, I forgot what was different about them. I think it had something to do with how it connects to the other parts that make up the head.
Anyway, here it is assembled:
Not only do we get more asymmetry, but we get pieces that are molded to look broken. This is, of course, intentional, and while it would drive me nuts to have such broken parts on one of my models, it looks cool here (as does the heterochromatic eyes).
Wings
The wings are pretty simple in construction, but they have a decent amount of articulation (more than what I’m showing in the photo below):

Arms
The arms themselves are perfectly symmetrical. It’s only the shoulders that aren’t:

In fact, not only are the shoulders asymmetrical, but neither of them match the shoulders on the original Wing Gundam (though I suppose the left shoulder comes closer)
A few more observations:
- The left shoulder has an extra little piece that the beam clock plugs into.
-
The left shoulder has the same vent coming out the side as found on the original Wing Gundam:
-
The hidden beam cannon in the right shoulder needs to be painted in (both the grey and the black sections):
It isn't a difficult paint job, but it's something I think could have been handled with color separated plastic instead.
-
In case you were wondering, yes, the yellow talons on the arms do extend outward:


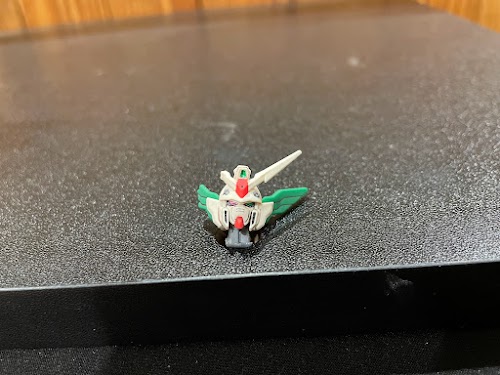
Complete!
And with that, the Wing Gundam Fenice is done:

All in all it was a nice breezy build. Stay tuned for the final post in the coming days.
- Technically there’s a seam line in the heel, but it’s hard to see. [return]