Alright, let’s take a look at this little Gogg.
But first, a few remarks.
- I'm covering the entire build in a single post. There's just not enough going on here to justify stretching it out any further.
-
I got some new toys at the hobby store, and I'm going to try them out with this build:
Granted, it's just two sheets of waterslide decals, but this is the first time I've ever purchased aftermarket decals like this. I purchased these two particular sheets for use on a few particular model kits, none of which are the Gogg. But there are so many of them here that I think I'll use some on the Gogg to spice it up and make it look a bit fancier.
- A lot of the photos you'll see here are from before I went back and added weathering. The final build is going to look a little bit different once it's all done.
Now, on to the build:
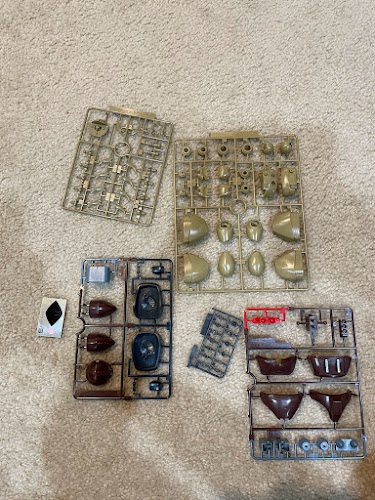
This is probably the simplest High Grade I’ve ever built. I’ve never seen one with so few parts. But that doesn’t mean it’s going to be a bad one. I’m already intrigued by what’s going on with all those parts for the arms and hands.
Legs and Feet
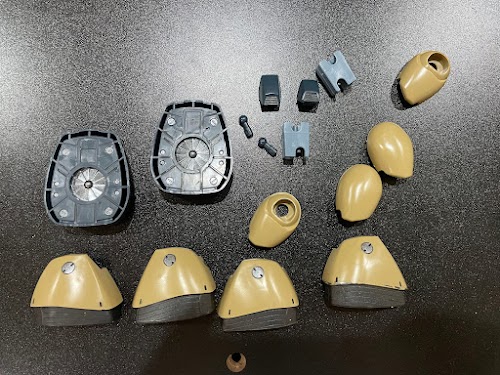
I normally don’t dump the legs and feet into the same section like this, but in this case they’re both too simple to cover alone.
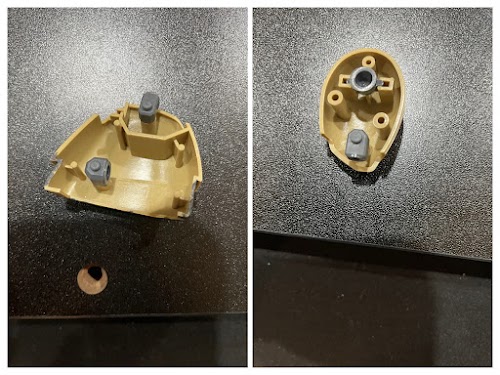
There are a few notes here regarding painting and detailing. First, the bottoms of the feet have a massive propeller in the center:
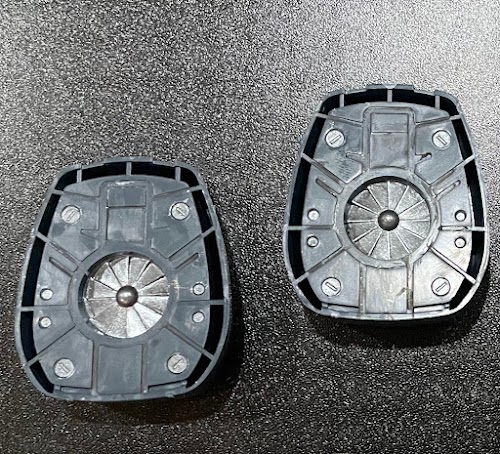
You don’t have to paint it, but it’s a great detail that decidedly marks it as an amphibious mobile suit.
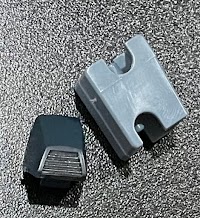
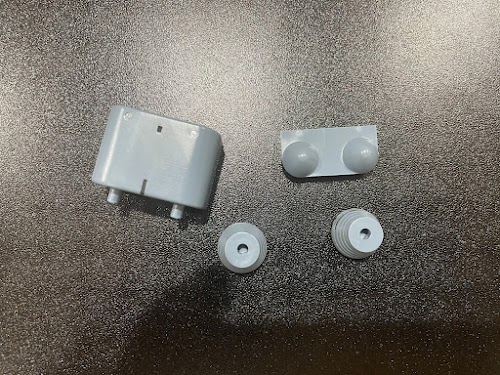
The upper section of the foot is made out of these two pieces:
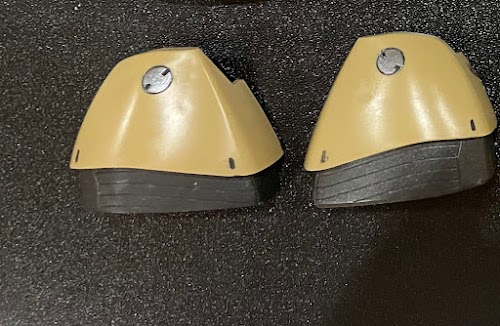
You’re supposed to paint the bottom half to make the model color accurate (though if you just panel lined them they’d still look pretty good). Those circular hatches near the top aren’t supposed to be painted silver, but I think they look better that way (especially with the black outline, which gives a sense of fake part separation).
You’re also supposed to paint this light blue knee joint (pictured here to the right):
This may seem like a lot of work, but the pieces are so large, so it doesn’t require a lot of finesse.
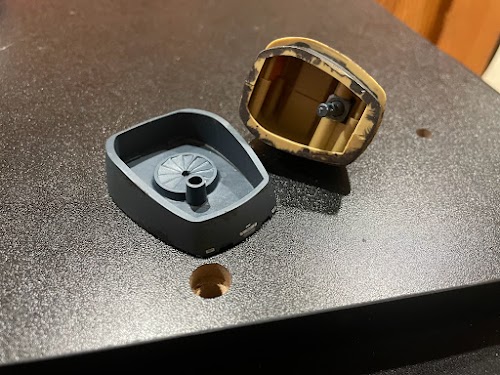
In terms of assembly, we start by putting some polycaps into both the legs and the feet:
Once they’re closed up, you connect them together using the knee joint. Finally, you plug the whole thing into the sole of the foot, via a peg on the inside:
This is what we end up with:


I tried using cement to remove the seamlines, but before that I got some ink in the cracks, and no amount of sanding made them go away. Later on I tried to cover it up with weathering.
Other than that, I’m happy with the result. There’s some nice color separation, and the sheer size reminds me of a old, bulky diving suit.
I’m also pleased with how the decals came out. They add a bit of a “Real Grade” vibe to an otherwise plain mobile suit.
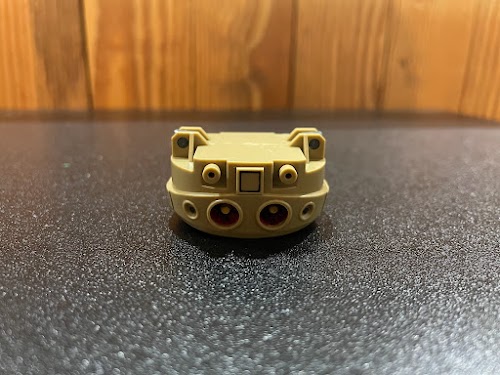
Lower Torso
It really doesn’t get any simpler than this.

The lower torso is made of just four pieces, with no polycaps whatsoever. I didn’t take photos of the final assembly, but you can probably figure out how the pieces fit together. Here’s a hint - the small rectangular piece (the one with the red vents) goes in its undercarriage.
Upper Torso
This is a bit more complex, relatively speaking:
Despite being an old kit, the Gogg has some nice parts layering. Here is the “core” of the upper torso:
Notice the polycaps in the shoulder area. This is one of the weirder aspects of the build. The way the polycaps are placed, you’d think they’d be able to move up and down. In reality this is not the case. You can see why in the photo below:
I popped on the brown outer armor, and then pushed in the two arm joints. Those joints plug directly into the polycaps, but they’re very clearly in a fixed position. What this means is that the polycaps have to be in a fixed positioned in order to make that connection; once it’s done, they’re not going anywhere.
Also, if you somehow screw up the angle of the polycaps, you’ll have to remove the brown armor and try again. Usually that’s not a problem, but if you like using cement to remove seamlines, such a mistake could prove costly. Be careful.
A Difference in Origin
I want to take a moment to talk about the red piece that goes in the tummy. The instruction manual makes it look as if there are supposed to be two clear pieces that attach in the center: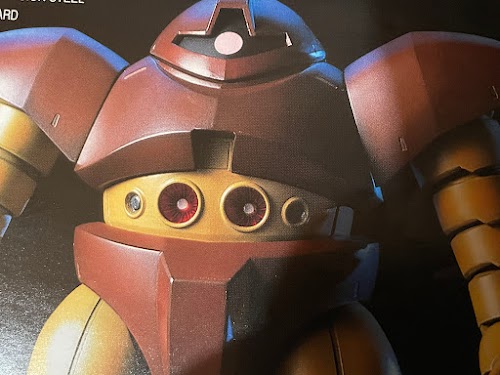 But there’s nothing like that in the box. I honestly don’t know if those are actual plastic parts, or paint, or what. I just know that I can’t replicate it, so instead I just painted them yellow.
Here’s the Gogg with half its body complete:
There are a few mistakes in this photo that are glaringly obvious to me. There’s a thumbprint right in the middle of the lower torso, and the yellow paint in the center looks crusty. I’ll be going back to fix these as best I can (though honestly, the yellow paint looks fine when I look at it in person. It’s weird how high resolution photos make things more apparent).
Mistakes aside, I love the look so far. There may not be many parts here, but the way they layer together - the way the various curves and lines interlock and play off each other - give the body a subtle sense of complexity. And the sheer size of the parts give the body a real sense of heft.
Seamlines
I tried really hard to remove as many seamlines as possible on this model. The results were mixed.I was only partially successful in removing some of them completely. The rest are lessened, but still visible. I'd probably have better luck if I primed and painted them. If that's the case, then for now I'll have to settle with partial success.
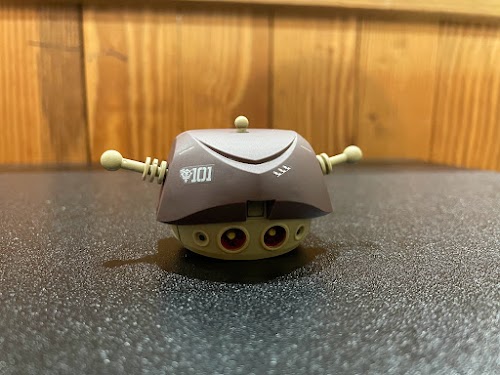
Backpack
The backpack is unique. It’s the same color plastic as the knee joint, but it’s supposed be this color. That makes it the only part of the mobile suit that isn’t some sort of earth tone. That certainly makes it stand out.
It also has a unique shape, at least compared to other mobile suit backpacks. It looks a bit like two rockets wrapped up in a muffler. Or maybe two oxygen tanks strapped together (or may be two missiles strapped together?)
I added some decals and did a tiny bit of painting, and later I’ll be adding some weathering too. For now, let’s strap it on:
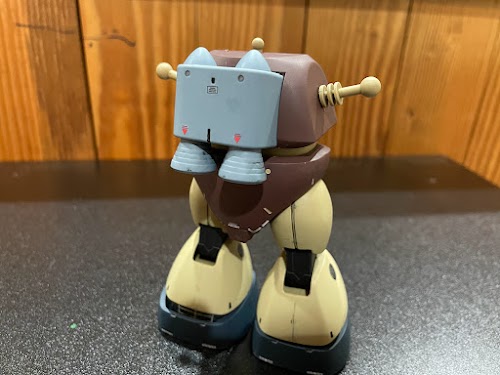
It’s funny - on its own it looks rather small, but when strapped to the Gogg it looks quite big. Not comically big, but it’s close.
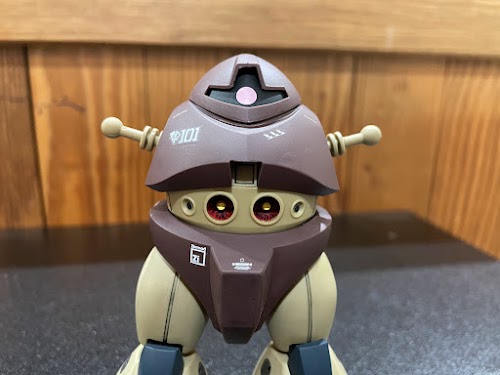
Head
It’s two pieces and a decal:
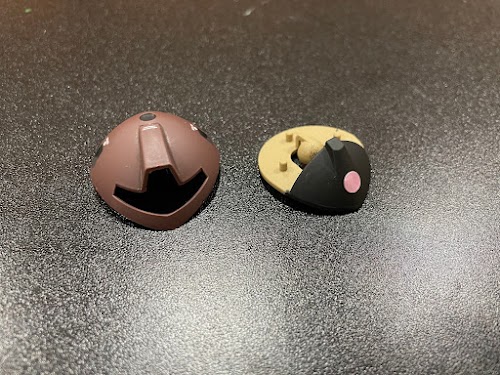
Technically it’s two pieces and two decals, as the kit comes with a black decal you can use in lieu of paint.
It is always important to line up the monoeye correctly, but it feels extra important here. Both the head and the monoeye are very large, which means that any misalignment is going to be extremely noticeable. Sure enough, mine looks like it’s veering off a bit to the right. Not enough to bother me, but I can still tell.
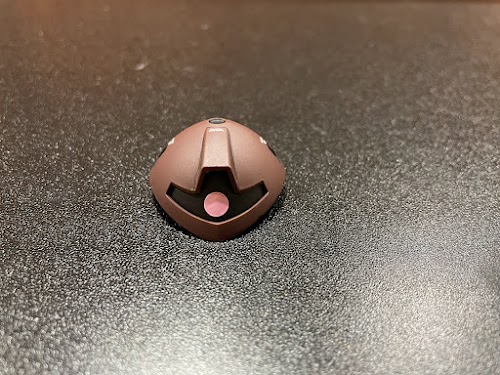
Since this is such an old kit, there’s no gimmick that moves the monoeye left and right. In fact, you can’t really move the head itself. So yeah, don’t screw it up!
Arms and Shoulders
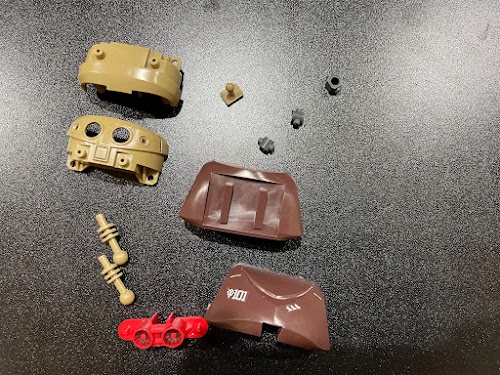
Now we get to the last - and most fun - part of the build:
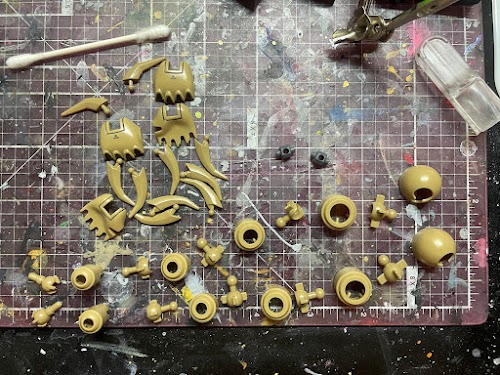
In this photo, I’ve laid out all the pieces for the arms and hands. The arm parts in particular are all lined up in the order in which they assemble. You simply insert each ball joint into its corresponding segment, and then fit the segments together. Most, if not all of these pieces cannot be mixed and matched, so it’s important to keep them in order.
As for the hands, you place all the claws in one half of the hand, add a polycap, and then close it all up with the other half. You have to be careful, as the claws aren’t very secure until you close the hand up. Move them even a bit, and they’re liable to fall out.
However, once you do close it all up, the claws remain in place. You can move them up, down, and around, but they’re not going to pop out on their own.
Here’s one of the assembled arms:
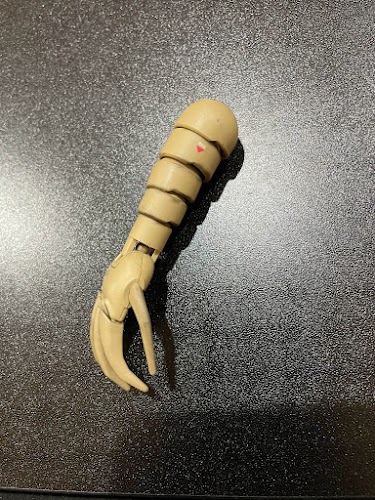
I love how this looks. I know it isn’t actually complicated, but feels like it is. Not many model kits have this many points of articulation in a single limb.
Finally we have the shoulders. I didn’t take a photo, since they’re just two simple pieces. They slide on once you attach the arms, though you have to be careful to line them up properly. The shoulder joints have two different notches, but the shoulders only plug into one of them.
Weathering
Amphibious mobile suits are practically tailor made for weathering.
I know what you may be thinking - Aren’t ALL mobile suits tailor made for weathering? There’s not a single place where they can fight and not get dirty or damaged
Which, yes, that’s true, but I like to think of it this way - you can take a shiny new car out on the road and not get it noticeably dirty. An airplane can take several flights and not look noticeably dirty.
You can’t take a boat out on the water and have it look pristine. At least not the parts that are in constant contact with the water. The ocean makes for a particularly brutal environment, which is why I think amphibious mobile suits need at least a bit of dirt, grime and rust on them.
That being said, I don’t think I did a great job with it here. I managed to somewhat salvage it by wiping some of it away, but in general it feels like I went too heavy in some spots.
I also think that the weathering clashes a bit with all the decals, the latter of which give it a sort of “fresh off the factory” vibe. Next time I’ll try chipping away at them or something, to give them more of a well worn feel. For now, though, I’m just going to leave them alone.
(Ironically, I actually think the weathering looks better in photographs than it does in person. That never happens)
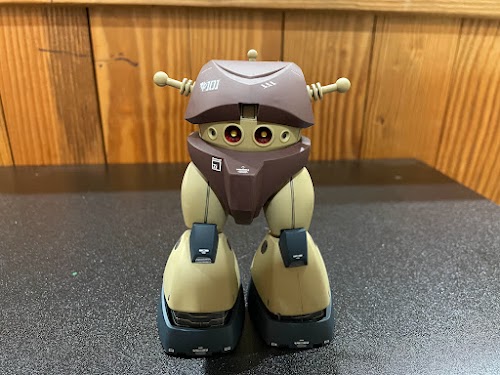
Finished!
Here’s the Gogg:
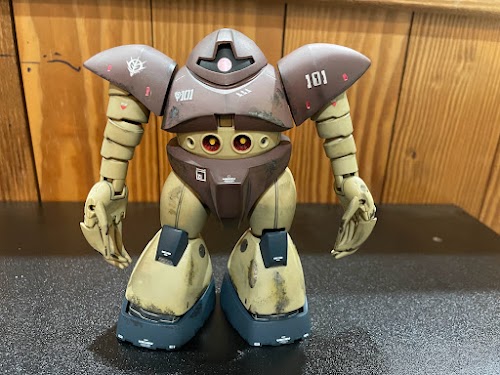
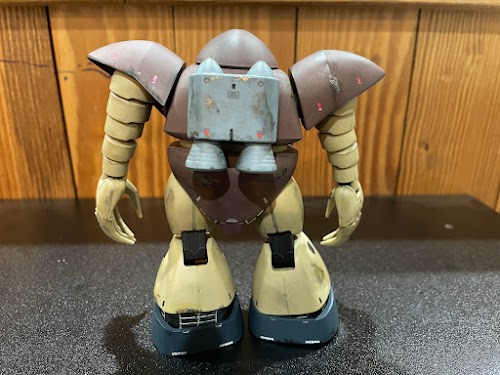
Until next time, where we’ll try some poses and see what this thing can do.