The Nu Gundam is complete, and now I’m ready to put it through its paces. This is a special model kit, with lots of special articulation, which means we have a lot of ground to cover.

Let’s start at the top. The model has quite a lengthy neck, so the head can move in any direction you choose:

It even has some side-to-side motion:

Moving down to the torso, if you pull open the hinge joint in the middle, you can get a fantastic bend in both directions:

And thankfully it twists as many degrees as you need:

On top of all that, the torso can rock side to side to quite a degree:

Now let’s look at the arms, because there is a lot going on there.
At first glance, it looks as if they can almost, but not quite go completely vertical. That’s still impressive considering how chunky the shoulder armor is:

But just kidding! Since the shoulder armor can move independently of the arm, if you move it a bit out of the way, you can in fact get it fully vertical:

Now let’s look at our first cool gimmick - you can actually pull the shoulder joint out of the torso like so:

This gives us even more range, meaning we can (among other things) do the vertical stretch without us even having to move the armor:

This also helps with the cross body range. Initially, it’s just okay, as good as the Nu’s stubby arms can muster:

But pop the shoulder joint out, and they can reach that much further:

Guess what folks? We’re still not done with the arms!
The wrists can pop down and out, which allows the hands to bend quite a ways inward:

I wish every model kit had this gimmick. It would make it so much easier to hold onto two handed weapons.
I mentioned previously that the shoulder armor is built on hinges. At first I didn’t think there was a purpose to this, but I was wrong. I discovered that if you flare out the shoulder armor along all of its hinges, you can raise the arm up without moving the armor with it:

Honestly, I’m not sure how it is useful outside of this “handshake” pose, but the option is there.
Finally, I forgot to check out the most obvious articulation in the arms - the elbow bend (it’s perfect by the way):

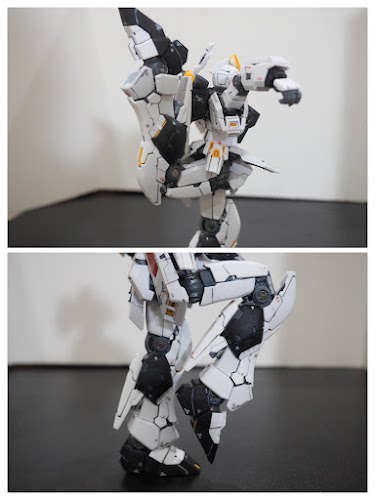
Now let’s head to the legs. Amazingly, the model can do a full split with the greatest of ease:

And yet it can’t perform a decent leg lift:

Or can it? I think it’s time for another gimmick!!!!
If you read my previous build post, you may remember this from the instructions:

These steps allegedly unlock more range of motion in the legs, so I went ahead and tried to follow the steps to see what they do. It wasn’t easy: I was thrown off a bit by steps 4, 5, and 7, and some of the pieces were a bit stiff, to the point where I was afraid to try and move them. Eventually I figured it out, and as it turns out, it does two things for us. First, it swings the hip joints down and further away from the torso, which should give them a few more degrees of motion before they make contact with the body. Second, it detaches the top half of the torso from the bottom half, which gives it even more of a forward bend:

After this little transformation, we can get a much better leg lift:

The torso is so simple in its construction, yet it can do so much. It truly is amazing.
Moving on, we know from earlier that the knee bend is pretty close to perfect, and I can also confirm that, amazingly, the long rear skirt armor does not get in the way of the back leg bend:
And to wrap it all up, we get a very nice toe bend to cap it all off:
Additional Gimmicks
There are a few more gimmicks that I’d like to mention before we wrap up. There are a few places where you can “open up” the armor. As far as I can tell, these are purely cosmetic in nature.
For instance, you can pop out some of the chest armor:

As well as pull down the front skirt armor:

And then there are the black pieces on the sides of the legs, which can pop down and out:

If you’re looking for a more practical gimmick, here you go: you can attach the bazooka to the model’s backpack:

It looks a bit funny, but it works. You even fit the fin funnels back on if you’d like:

Speaking of fin funnels, the kit comes with a second clippy thingie for the backpack:
This was added in anticipation for the double fin funnel that was eventually released by Premium Bandai, which allows you to mount a full twelve funnels:

If you don’t have that accessory set, however, you can still put three on each side if you really want to:

Conclusion
I’ve never seen a model kit with articulation quite like this. That is to say, I’ve never seen one with quite this much range, nor have I ever seen one that feels, for lack of a better word, so “responsive”. Every joint on this model feels rock solid. You can push and move them around with a great deal of force, but they never feel like they’re ever close to breaking. I may be proven wrong about this at a later date, but as of this writing, the RG Nu is holding up perfectly.
As far as I’m concerned, this is the best articulation I have ever seen in any model kit ever. When the worst thing you can say about a model is that the leg lift is only slightly higher than 90 degrees, you know you did something right. What an absolute legend of a Gunpla.
I can’t wait to get this thing in some poses. Stay tuned …
Other Thoughts
Testing the articulation of this model kit was an absolute joy. As hard and draining as the build might have been, it was worth it to get to this point. It is simply wondrous to watch these joints move around, and realize that you put this together (it’s also wondrous to realize that every single tiny piece was designed, engineered, and tested by a bunch of extremely talented people, who clearly have a lot of love for the Nu).